Table of Contents
- ทำความเข้าใจก่อนติดตั้ง
- Spec เครื่องที่แนะนำ
- วิธีติดตั้งบน Local Machine (Mac/Linux)
- วิธีติดตั้งบน VPS (Hetzner/DigitalOcean)
- การ Backup (สำคัญมาก!)
- Troubleshooting
- Security Best Practices
- สรุป
- Resources
หลังจากที่เขียนบทความเกี่ยวกับ Clawdbot/Moltbot และ drama ที่เกิดขึ้น ไปแล้ว หลายคนถามผมว่าจะติดตั้งยังไง วันนี้ผมจะมาอธิบายแบบ step-by-step ครับ
ทำความเข้าใจก่อนติดตั้ง
Moltbot (เดิมชื่อ Clawdbot) ทำงานแบบ Gateway-centric architecture:
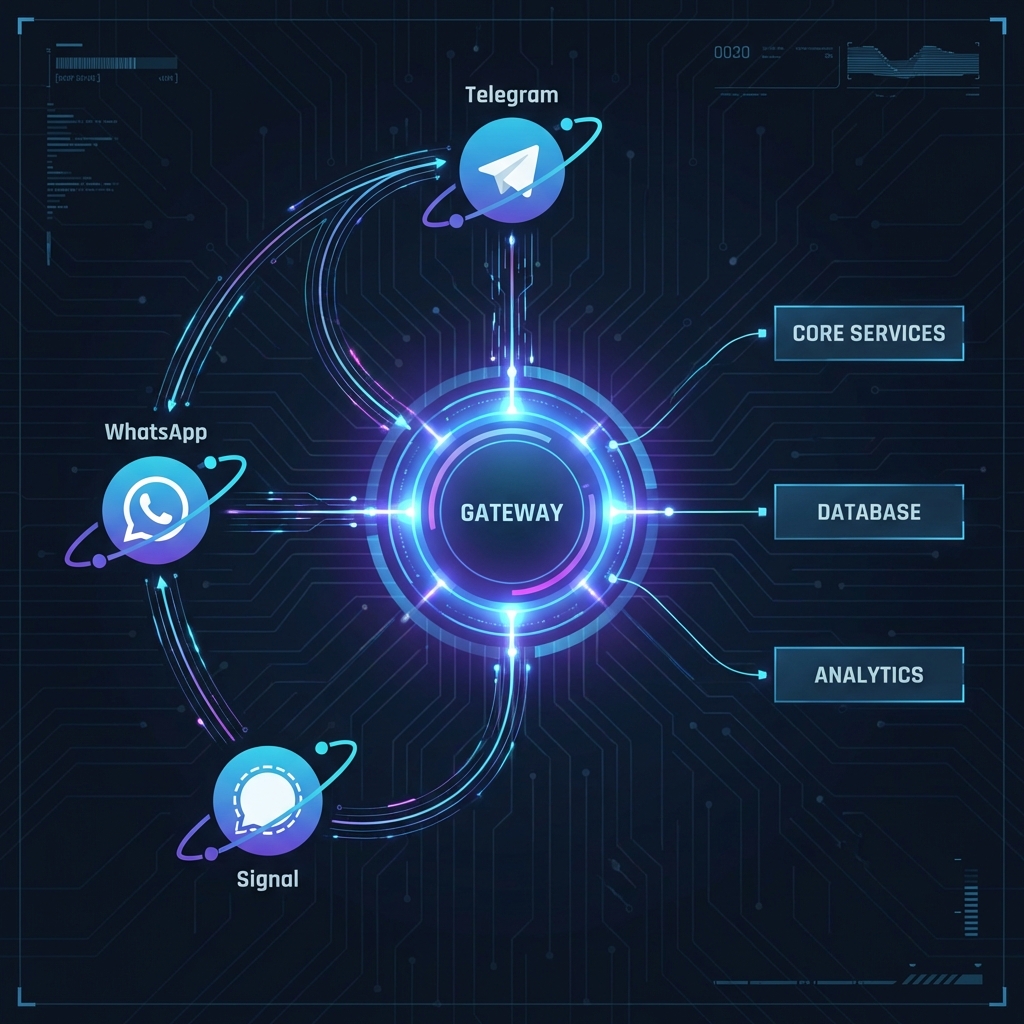
Gateway คือ daemon ที่รันตลอดเวลา ทำหน้าที่:
- เชื่อมต่อกับ messaging platforms ต่างๆ
- จัดการ sessions และ memory
- เรียกใช้ AI model (Claude, OpenAI, etc.)
- รัน tools และ skills
ดังนั้น ถ้าคุณอยากให้ Moltbot ทำงาน 24/7 และส่งข้อความหาคุณ proactively ได้ เครื่องต้องเปิดตลอด
Spec เครื่องที่แนะนำ
Minimum Requirements
| Component | Minimum | Recommended |
|---|---|---|
| CPU | 1 vCPU | 2 vCPU |
| RAM | 1 GB | 2-4 GB |
| Storage | 500 MB | 10 GB+ |
| Node.js | v22+ | v22+ (LTS) |
| OS | Ubuntu/Debian | Ubuntu 24.04 LTS |
หมายเหตุ:
- ถ้าจะใช้ browser automation (เปิด Chrome ให้ AI ควบคุม) ต้องการ RAM อย่างน้อย 4 GB
- ถ้าใช้ multiple channels พร้อมกัน ควรมี RAM 2 GB ขึ้นไป
ตัวเลือก Hardware

1. Mac Mini (Premium Option) 💰💰💰
เหมาะสำหรับ: คนที่ต้องการ iMessage integration หรือต้องการประสิทธิภาพสูงสุด
| Spec | ราคา |
|---|---|
| Mac Mini M4 (16GB) | ~$599-799 |
| Mac Mini M4 Pro (24GB) | ~$1,399+ |
ข้อดี:
- เงียบมาก กินไฟน้อย
- รองรับ iMessage (macOS only)
- Performance ดีเยี่ยม
- มี macOS companion app
ข้อเสีย:
- ราคาแพง
- ต้องวางไว้ที่บ้าน
2. VPS (Budget Option) 💰
เหมาะสำหรับ: คนที่ต้องการ 24/7 uptime โดยไม่ต้องเปิดเครื่องที่บ้าน
| Provider | Plan | RAM | ราคา/เดือน |
|---|---|---|---|
| Hetzner | CX22 | 4 GB | ~€3.49 |
| DigitalOcean | Basic | 2 GB | $12 |
| Linode | Nanode | 1 GB | $5 |
| Vultr | Cloud | 2 GB | $10 |
ข้อดี:
- ราคาถูก ($3.5-12/เดือน)
- 24/7 uptime ไม่ต้องดูแล
- อยู่ใน data center มี backup
- Scale up ได้ง่าย
ข้อเสีย:
- ไม่มี iMessage support
- Browser automation ต้องรัน headless
3. Raspberry Pi (DIY Option) 💰
เหมาะสำหรับ: คนที่มี Pi อยู่แล้วหรือชอบ tinker
| Model | RAM | ราคา |
|---|---|---|
| Raspberry Pi 5 | 8 GB | ~$80 |
| Raspberry Pi 4 | 4 GB | ~$55 |
ข้อดี:
- ซื้อครั้งเดียวจบ
- กินไฟน้อยมาก
- เรียนรู้ได้เยอะ
ข้อเสีย:
- Setup ยากกว่า
- Performance จำกัด
4. Old Laptop/PC (Free Option) 💰
เหมาะสำหรับ: คนที่มี hardware เก่าอยู่แล้ว
ข้อดี:
- ฟรี (ถ้ามีอยู่แล้ว)
- macOS = iMessage support
ข้อเสีย:
- กินไฟ + ร้อน + เสียง
- ต้องเปิดตลอด
วิธีติดตั้งบน Local Machine (Mac/Linux)
Step 1: ติดตั้ง Prerequisites
macOS
# ติดตั้ง Homebrew (ถ้ายังไม่มี)
/bin/bash -c "$(curl -fsSL https://raw.githubusercontent.com/Homebrew/install/HEAD/install.sh)"

# ติดตั้ง Node.js 22
brew install node@22

# ตรวจสอบ version
node --version  # ควรได้ v22.x.x
npm --version
Ubuntu/Debian
# Update system
sudo apt update && sudo apt -y upgrade

# ติดตั้ง dependencies
sudo apt -y install git curl build-essential jq ca-certificates

# ติดตั้ง Node.js 22 จาก NodeSource
curl -fsSL https://deb.nodesource.com/setup_22.x | sudo -E bash -
sudo apt-get install -y nodejs

# ตรวจสอบ version
node --version  # ควรได้ v22.x.x
npm --version
Step 2: ติดตั้ง Moltbot CLI
วิธีที่ง่ายที่สุดคือใช้ installer script:
curl -fsSL https://molt.bot/install.sh | bash
หรือติดตั้งผ่าน npm:
npm install -g moltbot@latest
ตรวจสอบการติดตั้ง:
moltbot --version
Step 3: รัน Onboarding Wizard
นี่คือ step ที่สำคัญที่สุด:
moltbot onboard --install-daemon
Wizard จะถามหลายอย่าง:
3.1 Gateway Mode
? Gateway mode
> Local (recommended for personal use)
  Remote
เลือก Local ถ้ารันบนเครื่องตัวเอง
3.2 Authentication
? How do you want to authenticate?
> API Key (recommended)
  OAuth (Claude Pro/Max subscription)
แนะนำ: ใช้ API Key จาก Anthropic หรือ OpenAI
- Anthropic API: https://console.anthropic.com/
- OpenAI API: https://platform.openai.com/
3.3 Model Selection
? Default model
> anthropic/claude-opus-4-5 (best quality)
  anthropic/claude-sonnet-4-5 (balanced)
  openai/gpt-4o
  local/ollama (offline)
แนะนำ: Claude Opus 4.5 สำหรับ complex tasks หรือ Sonnet 4.5 สำหรับ balance ระหว่าง quality/cost
3.4 Channel Setup
? Which channels do you want to enable?
  [x] Telegram (easiest setup)
  [ ] WhatsApp
  [ ] Discord
  [ ] Slack
แนะนำสำหรับมือใหม่: เริ่มจาก Telegram เพราะ setup ง่ายที่สุด

วิธีสร้าง Telegram Bot:
- เปิด Telegram แล้วค้นหา
@BotFather - ส่ง
/newbot - ตั้งชื่อ bot
- Copy bot token ที่ได้มาใส่ใน wizard
3.5 Skills
? Install recommended skills?
> Yes (recommended)
  No, I'll configure later
เลือก Yes เพื่อติดตั้ง skills พื้นฐาน (weather, github, web search, etc.)
3.6 Daemon Installation
? Install as background service?
> Yes (recommended - runs 24/7)
  No (manual start required)
เลือก Yes เพื่อให้ Moltbot รันตลอดแม้ปิด terminal
Step 4: ตรวจสอบสถานะ
# ดูสถานะ gateway
moltbot gateway status

# ดู health check
moltbot health

# ดู security audit
moltbot security audit --deep

# ดูสถานะทั้งหมด (debug report)
moltbot status --all
Step 5: Approve Pairing
เมื่อคุณส่งข้อความแรกไปหา bot บน Telegram จะได้รับ pairing code
# ดู pending pairings
moltbot pairing list telegram

# Approve pairing
moltbot pairing approve telegram <code>
หลังจาก approve แล้ว bot จะเริ่มตอบได้!
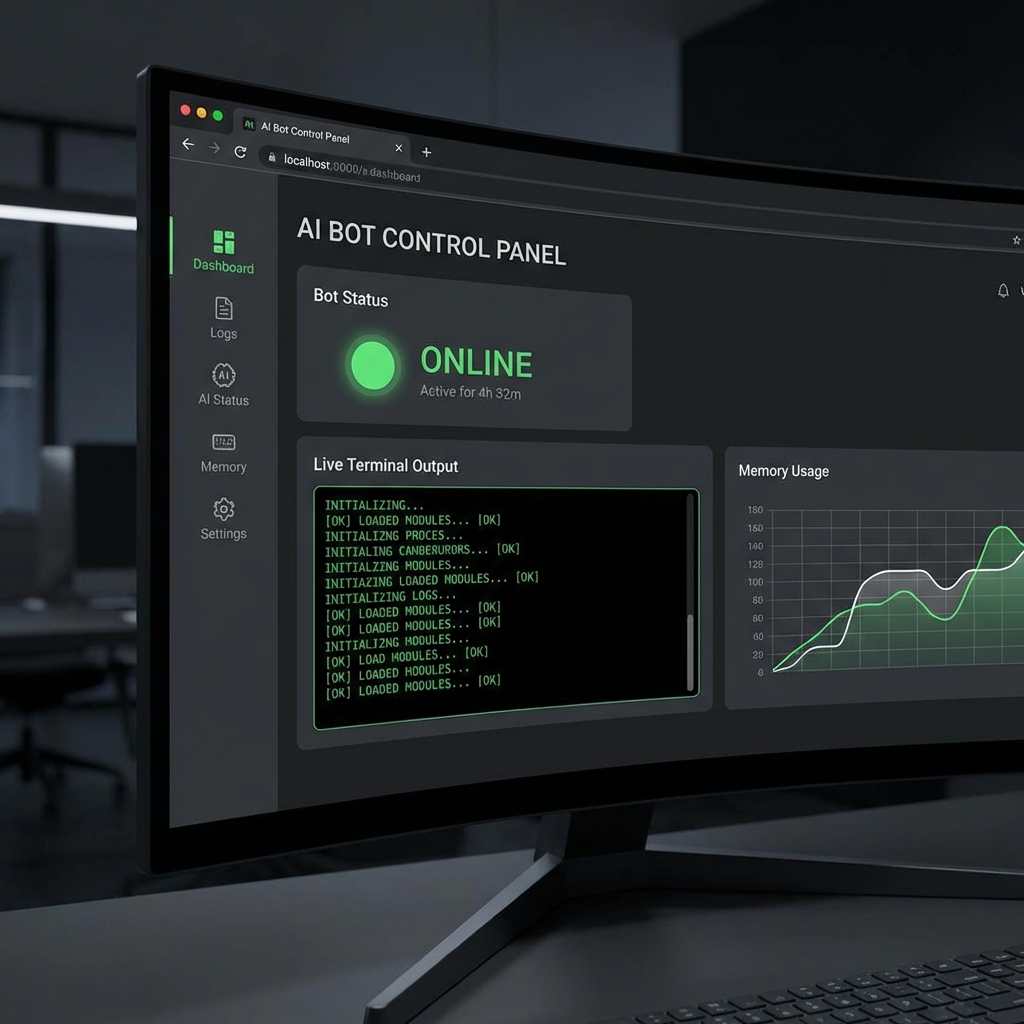
Step 6: เปิด Dashboard (Optional)
moltbot dashboard
จากนั้นเปิด browser ไปที่ http://127.0.0.1:18789/
วิธีติดตั้งบน VPS (Hetzner/DigitalOcean)
Step 1: สร้าง VPS
Hetzner (แนะนำ - ถูกที่สุด)

- ไปที่ https://console.hetzner.cloud/
- สร้าง Project ใหม่
- Add Server:
- Location: Nuremberg (หรือใกล้คุณที่สุด)
- Image: Ubuntu 24.04
- Type: CX22 (2 vCPU, 4GB RAM) - €3.49/เดือน
- SSH Key: เพิ่ม public key ของคุณ
DigitalOcean

- ไปที่ https://cloud.digitalocean.com/
- Create Droplet:
- Image: Ubuntu 24.04
- Plan: Basic $12/mo (2GB RAM)
- Region: Singapore หรือใกล้คุณ
- Authentication: SSH Key
Step 2: SSH เข้า Server
ssh root@YOUR_SERVER_IP
Step 3: สร้าง User แยก (Security Best Practice)
# สร้าง user ใหม่
adduser moltbot

# ให้สิทธิ์ sudo
usermod -aG sudo moltbot

# Switch ไปใช้ user ใหม่
su - moltbot
Step 4: ติดตั้ง Dependencies
# Update system
sudo apt update && sudo apt -y upgrade

# ติดตั้ง packages ที่จำเป็น
sudo apt -y install git curl build-essential jq ca-certificates openssl ufw htop

# ติดตั้ง Node.js 22
curl -fsSL https://deb.nodesource.com/setup_22.x | sudo -E bash -
sudo apt-get install -y nodejs

# ตรวจสอบ
node --version
npm --version
Step 5: เพิ่ม Swap File (สำหรับ VPS RAM น้อย)
# สร้าง swap 2GB
sudo fallocate -l 2G /swapfile
sudo chmod 600 /swapfile
sudo mkswap /swapfile
sudo swapon /swapfile

# ทำให้ permanent
echo '/swapfile none swap sw 0 0' | sudo tee -a /etc/fstab

# ปรับ swappiness
sudo sysctl vm.swappiness=10

# ตรวจสอบ
free -h
Step 6: ตั้งค่า Firewall
# Enable UFW
sudo ufw default deny incoming
sudo ufw default allow outgoing
sudo ufw allow ssh
sudo ufw enable

# ตรวจสอบ
sudo ufw status
สำคัญ: อย่าเปิด port 18789 ต่อ public internet! ใช้ SSH tunnel แทน
Step 7: ติดตั้ง Moltbot
# ติดตั้ง CLI
curl -fsSL https://molt.bot/install.sh | bash

# หรือผ่าน npm
npm install -g moltbot@latest

# รัน onboarding
moltbot onboard --install-daemon
ทำตาม wizard เหมือน local installation
Step 8: เข้าถึง Dashboard ผ่าน SSH Tunnel
จากเครื่อง local ของคุณ:
# สร้าง SSH tunnel
ssh -L 18789:127.0.0.1:18789 moltbot@YOUR_SERVER_IP
จากนั้นเปิด browser ไปที่ http://127.0.0.1:18789/
Step 9: จัดการ Service
# ดูสถานะ
moltbot gateway status

# Restart
moltbot gateway restart

# Stop
moltbot gateway stop

# Start
moltbot gateway start

# ดู logs
moltbot logs
การ Backup (สำคัญมาก!)
Moltbot เก็บข้อมูลสำคัญใน:
~/.moltbot/- Configuration และ credentials~/clawd/- Workspace, memory, และ sessions
Backup Command
# Backup ไปยัง local machine
scp -r moltbot@YOUR_SERVER_IP:~/.moltbot ./backup-moltbot-$(date +%Y%m%d)
scp -r moltbot@YOUR_SERVER_IP:~/clawd ./backup-clawd-$(date +%Y%m%d)
หรือใช้ VPS Snapshots
ทั้ง Hetzner และ DigitalOcean มี snapshot feature - แนะนำให้ทำ snapshot ก่อน major updates
Troubleshooting
ปัญหาที่พบบ่อย
1. “No auth configured”
# กลับไปรัน wizard อีกครั้ง
moltbot onboard
2. Node version ไม่ถูกต้อง
# ตรวจสอบ version
node --version

# ถ้าไม่ใช่ v22 ให้ reinstall
curl -fsSL https://deb.nodesource.com/setup_22.x | sudo -E bash -
sudo apt-get install -y nodejs
3. Service ไม่ start
# Enable lingering สำหรับ systemd user service
sudo loginctl enable-linger $USER

# ดู logs
journalctl --user -u moltbot-gateway -f
4. Bot ไม่ตอบ
# ตรวจสอบว่า pairing approved หรือยัง
moltbot pairing list telegram
moltbot pairing approve telegram <code>
Security Best Practices
- อย่า expose Gateway ไปยัง public internet - ใช้ SSH tunnel เสมอ
- ใช้ sandbox mode สำหรับ group chats และ untrusted inputs
- Review permissions - อย่าให้ full shell access ถ้าไม่จำเป็น
- Backup regularly - ข้อมูลหายคือ memory หายทั้งหมด
- Monitor token usage - Complex tasks กิน tokens เยอะ
# รัน security audit
moltbot security audit --deep

# ดู doctor report
moltbot doctor
สรุป
| ตัวเลือก | ค่าใช้จ่าย | ความยาก | 24/7 | iMessage |
|---|---|---|---|---|
| Mac Mini | $599+ | ง่าย | ✅ | ✅ |
| VPS (Hetzner) | ~$3.5/เดือน | ปานกลาง | ✅ | ❌ |
| Raspberry Pi | $55-80 | ยาก | ✅ | ❌ |
| Old Laptop | ฟรี | ง่าย | ⚠️ | ถ้าเป็น Mac |
คำแนะนำของผม:
- เริ่มต้น: ใช้ VPS ราคาถูก ($5/เดือน) กับ Telegram
- จริงจัง: Mac Mini + Claude Max subscription
- Budget: Raspberry Pi หรือ laptop เก่า
การติดตั้ง Moltbot ไม่ยากอย่างที่คิด แต่ต้องใช้เวลา configure ให้เหมาะกับ workflow ของคุณ
ถ้ามีคำถามเพิ่มเติม ถามมาได้เลยครับ! 🦞
Resources
- Official Docs: https://docs.molt.bot
- GitHub: https://github.com/moltbot/moltbot
- Discord Community: https://discord.gg/clawd
- DigitalOcean Guide: https://www.digitalocean.com/community/tutorials/moltbot-quickstart-guide


%20%E0%B8%89%E0%B8%9A%E0%B8%B1%E0%B8%9A%E0%B8%AA%E0%B8%A1%E0%B8%9A%E0%B8%B9%E0%B8%A3%E0%B8%93%E0%B9%8C:%20%E0%B8%9A%E0%B8%99%20Mac,%20PC%20%E0%B9%81%E0%B8%A5%E0%B8%B0%20VPS)